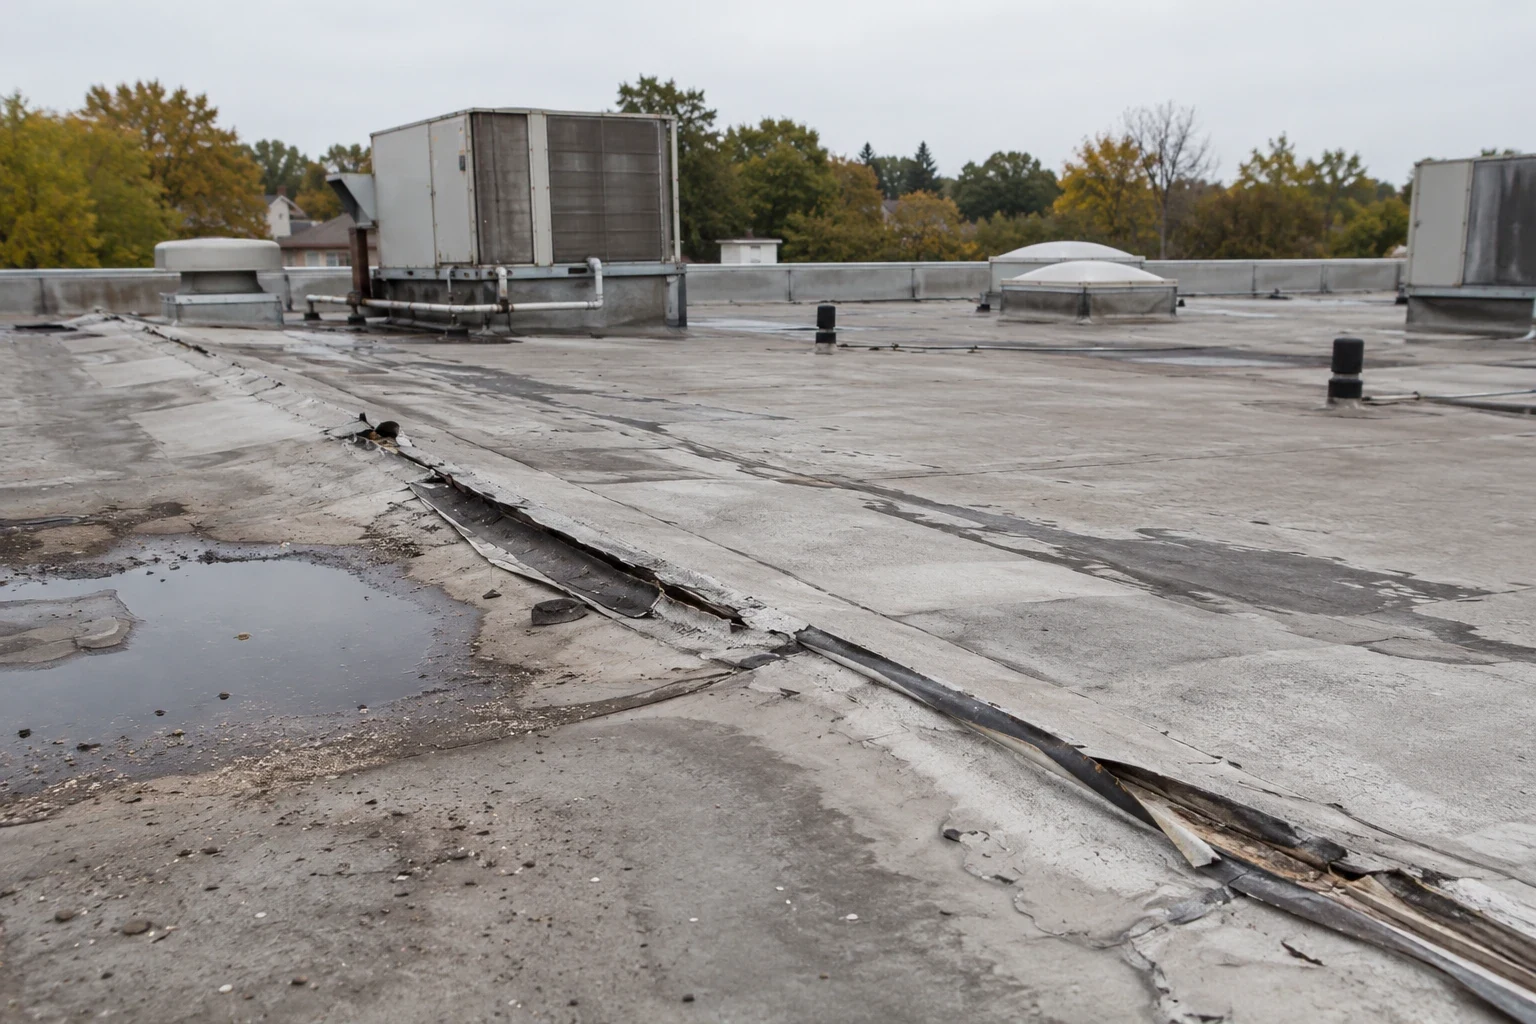
A loose edge or displaced sheet can expose more roof than the first ceiling stain suggests. In Springfield, the June 1, 2011 EF3 tornado crossed the Connecticut River and damaged large commercial brick structures, with roofs removed from some buildings. That history makes corners, perimeters, and transitions worth checking after severe wind, but each building needs its own field review. We start with the reported location, access, and active water entry. Then we mark the affected section, separate temporary protection from permanent repair, and keep dry areas outside the work zone. A Medical District building with occupied clinical areas may need a different route than a property near the State Street corridor. The plan follows the roof condition and the people below it.
Map the wind path
We check perimeter metal, corners, coping, exposed fasteners, and transitions where a membrane meets a wall or equipment curb. A lifted edge can pull at the next attachment line; a puncture can admit water without obvious displacement. We photograph the defect before moving loose material, mark its position on the roof plan, and note whether nearby surfaces are dry, wrinkled, or patched. That keeps the estimate tied to the observed limit instead of a broad guess about the whole roof.
At a detached edge, we check each fastener row, compare the metal with the membrane termination, and mark where attachment returns to a stable pattern. If the edge cannot be secured in the current weather window, we list the temporary protection and return condition rather than closing the work order around an unstable detail.
Inside, the leak pattern helps select the next section. Water can travel through insulation or along a deck before it appears indoors, so we compare timing with seams, walls, drains, and penetrations. If insulation is wet, we mark it separately from the membrane opening. A roof inspection can document the condition; we also compare wind-related openings with a flashing review or drainage repair when the water path points there. Unsafe access, a wet surface, or a damaged hatch may require a separate visit plan.
Protect the open section
Temporary protection controls exposure until the permanent assembly can be repaired. We remove only loose material that prevents a safe cover, then secure a temporary membrane or compatible patch to sound material. The tie-in needs enough room for the lasting repair. A cover that traps water or hides an unstable perimeter can complicate the next visit, so we photograph its limits and record the return conditions.
On an occupied building, the work zone includes the space below. We check whether water is reaching electrical equipment, ceiling systems, stock, or an active room, and coordinate the sequence with the site contact. Where one area can remain open while another is repaired, we define the boundary and protect the transition before leaving. Occupied-building work needs a clear tenant route and a safe path for tools and removed material. For damaged metal, we check whether fasteners have pulled out, cleats remain engaged, and the edge can be reused. A coping repair may cover one run or require connected sections to be opened.
Choose repair or replacement
A focused repair fits when damage is isolated and the surrounding roof can accept a sound tie-in. We remove wet or detached material to stable limits, then install compatible insulation, membrane, flashing, or metal components. Selection depends on the existing system, attachment, deck condition, and extent of damage. We verify the boundary before closing the assembly, because a small opening over wet insulation can conceal a larger problem.
Replacement becomes a useful comparison when wind has affected repeated edges, several sections, or a deteriorated system. The decision also depends on recover eligibility, deck attachment, drainage, and permit review. We document those conditions before recommending a larger scope. A replacement scope can be phased by roof section, with a storm-damage review organizing urgent protection and permanent work. Springfield repair work may require plan review and inspection under the permit conditions. We give the owner’s project team the roof scope and field findings needed to coordinate that work.
Keep operations moving
Work sequencing starts with the building schedule. We confirm roof access, fall protection, tenant hours, lift limits, and staging locations. If several sections are damaged, we rank them by active water entry, safety exposure, and the area left open during repair. One section can be closed and checked before another is opened, reducing the amount of temporary work exposed at shift end. At the I-91/I-291 crossings, we confirm the dispatch route separately from the safe roof-access point with the property contact.
State Street connects business and institutional frontage across Springfield. For a building along that corridor, street-side access can affect lift placement and deliveries. We verify the entrance, staging area, and material route with the property team, then divide the work into practical windows. Before closeout, we inspect the tie-in, terminations, fasteners, and nearby drain path. Photos show the condition before and after repair. The turnover record states what was secured and what should trigger another review, such as new leakage or movement at an adjoining edge.
What sets the scope
Price and timing depend on roof height, access, material availability, affected sections, and whether wet insulation or damaged deck appears after opening the membrane. Work near operating equipment may need extra protection below. Edge metal may require a custom measure; a membrane patch may need a wider tie-in to reach stable material. We separate confirmed work from items that could change once the assembly is open.
Wind-driven water can reach insulation, ceilings, or stored contents, particularly if temporary protection shifts. If the roof is safe to access, an inspection can locate the exposed edge and define a repair. The scope names the compatible membrane or metal detail, the tie-in limits, and any substrate work that must be verified after opening. That keeps the repair sequence tied to what the crew finds rather than a material assumption. If access must wait for clearance, keep the room below clear and tell us when water appears so we can set a safe return visit. After work, we provide photographs, limits, installed materials, and follow-up items. Testing or permit review that remains open is listed separately, giving the facilities team a clear starting point for its next roof decision.
Commercial Roofing Questions
What should be checked after wind lifts an edge?
We inspect the metal, cleats, fasteners, adjacent membrane, and the first attachment line beyond the visible lift. Photographs and a marked roof plan show whether the repair can stop at that point or needs a wider opening.
Can a ceiling leak show where the roof opened?
The stain narrows the search, but water can travel through insulation or along a deck before it appears inside. We compare the leak timing with seams, walls, drains, and penetrations in the matching roof section.
Can the building remain occupied during repair?
Often the work can be separated by roof section, but access below, noise, lifts, and indoor water protection set the sequence. We confirm those limits with the site contact before opening the assembly.
When does wind damage call for replacement?
Repeated failures, widespread attachment loss, wet insulation across sections, or a deck concern can make a replacement comparison useful. We document those conditions before setting the scope.
What will the closeout include?
The record lists the repaired location, observed assembly, materials used, photographs, and any remaining access or monitoring item. That lets the facilities team connect later leakage to the right roof area.